As we all know, our bank accounts don't just have deposits, they also have withdrawals. So let's continue to make the model more realistic by adding some withdrawals, in this case, a purchase (of a random amount) approximately once every three months.
To do this we will again need to add two elements that are part of the basic GoldSim framework to the model: a Timed Event An element that generates discrete event signals based on a specified rate of occurrence., and a Discrete Change. We will also add a Stochastic element An element that can be used to quantitatively represent the uncertainty in a model input. to represent the amount of the purchase.
First, we need to return to Edit Mode The state of a model when it is being edited and does not contain simulation results. (press F4 and select OK). Now let's start by inserting another Timed Event element, and changing the element's name to "Purchase". Purchase will be a random (as opposed to a regular) event with an average rate of occurrence of once every 90 days:

Next we need to specify the consequence of the Purchase: the generation of a withdrawal of a particular quantity. We will do this by using a Discrete Change element An element that generates discrete change signals that can subsequently modify stock elements.. However, before we do that, we need to specify the amount of each purchase. Since unlike a paycheck, purchase amounts are random, we will use a Stochastic element to model this.
A Stochastic is inserted by right-clicking in the graphics pane, and selecting Insert Element|Inputs|Stochastic from the context menu:
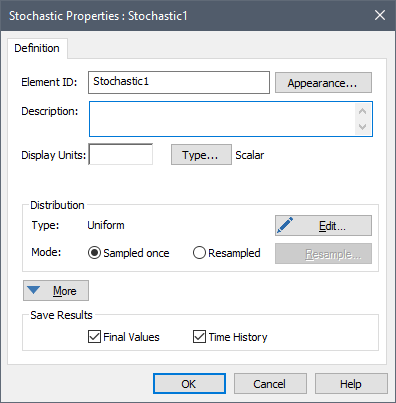
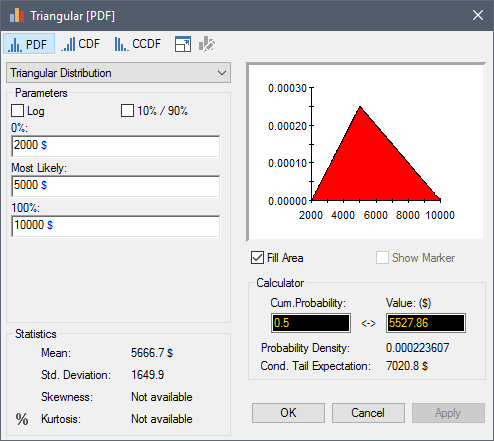
Change the element's name to "Purchase_Amount" and specify Display Units The units (e.g., m, g, $/day) in which an output is displayed within GoldSim. of $. Next press the Edit... button to define the distribution. We will assume a Triangular distribution, with Minimum value of $2000, a Most Likely value of $5000, and a Maximum value of $10000:
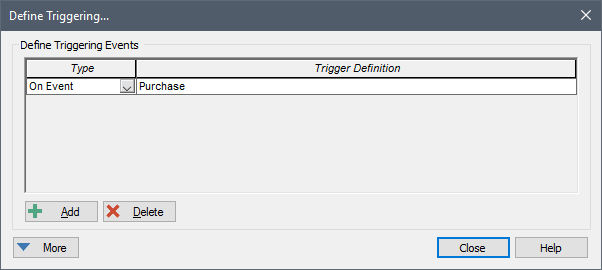
Press OK to return to the Stochastic dialog. We need to specify that this distribution is resampled whenever a purchase occurs. To do so, select the Resampled radio button, and then press the Resample... button that becomes active when you do so. In the trigger dialog that is displayed, press the Add button, and then in the Trigger Definition field, enter "Purchase":
Close this dialog as well as the Stochastic dialog.
Now we can create the Discrete Change dialog that represents the actual withdrawal. Insert a Discrete Change element, and name it "Purchase_Withdrawal". Specify Display Units of $, and in the Value field, enter "Purchase_Amount". Leave the Instruction as Add. Next, we need to specify that Purchase_Withdrawals is triggered whenever the Purchase occurs (just as we did for the Stochastic element). To do this, press the Trigger... button. In the trigger dialog that is displayed, press the Add button, and then in the Trigger Definition field, enter "Purchase".
Close this dialog as well as the Discrete Change dialog.
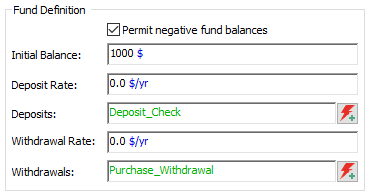
Finally, we need to tell GoldSim where the money is withdrawn from. To do this, double-click on the Bank_Account, and enter "Purchase_Withdrawal" in the Withdrawals input field:
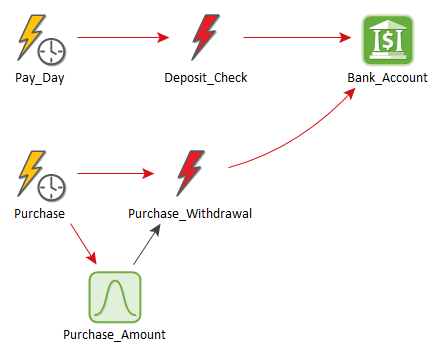
After you close the Bank_Account, your model should look something like this:
- Step 1: Setting Up a Dynamic Financial Model
- Step 2: Adding a Fund Element to Simulate a Bank Account
- Step 3: Running the Model and Viewing a Simple Result
- Step 4: Adding Discrete Deposits to the Account
- Step 5: Running the Model with Deposits
- Step 6: Removing Discrete Withdrawals from the Account
- Step 7: Running the Model with Deposits and Withdrawals
- Step 8: Running Multiple Realizations of a Financial Model
- Where Do I Go From Here?