Scenario Data are the Data elements that differentiate the various scenarios in your model. GoldSim provides several ways to specify Scenario Data.
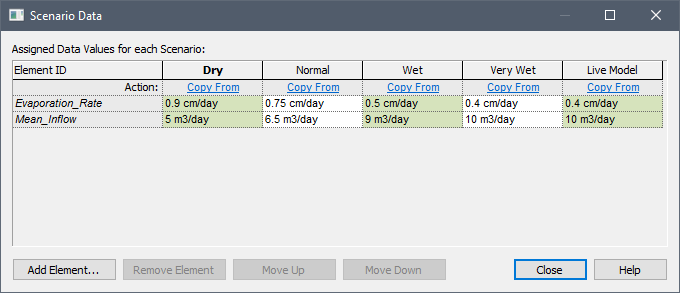
The most straightforward way to specify Scenario Data is to use the Scenario Manager. The Scenario Manager can be accessed from the main menu (Run | Scenario Manager... ) or by pressing F7. Within this dialog, you will find a button labeled Scenario Data.... Pressing this button displays the following dialog:

Each row in this dialog represents a Scenario Data element An input element intended to represent constant inputs in a model.. Each column represents a scenario A specific set of input data (and corresponding outputs) for a model. Multiple scenarios can be defined for a model. Different scenarios within a model are specifically differentiated by having different values for one or more Data elements.. You can add new Scenario Data Data elements that differentiate the various scenarios in a model. using the Add Element... button. You can subsequently edit the value for any Scenario Data element in any defined scenario. This table is very convenient because it displays all Scenario Data values for all defined scenarios side-by-side.
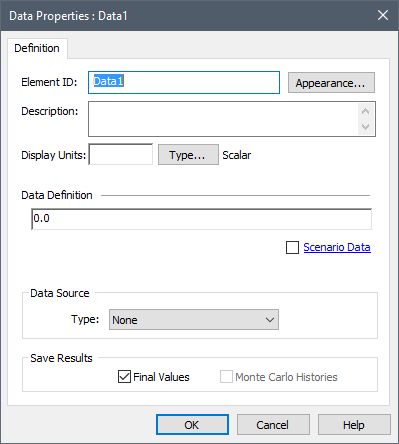
You can also edit Scenario Data directly in your model. Once you have defined at least one Scenario in your model, the dialog for Data elements is modified slightly. In particular, the dialog provides an option to define a Data element as a Scenario Data element:

In this particular example, we are viewing a Data element that has not yet been defined as being Scenario Data (and hence it has the same value for all Scenarios). As can be seen, a Scenario Data checkbox is available (and in this case, unchecked). Checking this box would add this to the list of Scenario Data elements displayed in the Scenario Data dialog accessed via the Scenario Manager A dialog that allows you to create, define and run scenarios..
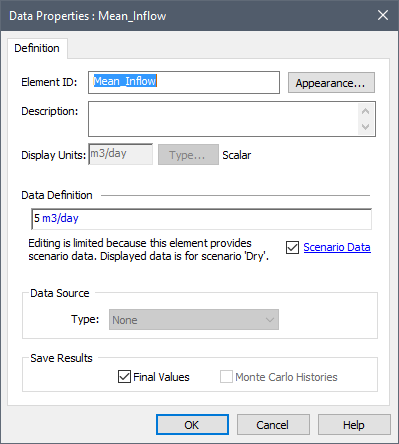
Here is the dialog for a Data element that has already been defined as Scenario Data:

Note that in this case, the Scenario Data box is checked. Like all Data elements, a Scenario Data element has a single value. That is, it cannot display the value for all scenarios; it can only show you the value for one scenario at a time. The dialog indicates which scenario is being displayed (in this example, the "Dry" scenario is being displayed).
As discussed
Note: In addition to editing Scenario Data directly in your model as described above, you can also link Scenario Data elements to Dashboard A special GoldSim element that allows you to build custom interfaces or "control panels" for your models. controls and edit (and create) Scenarios via a Dashboard.
To highlight those Data elements that are Scenario Data, they have different symbols in the graphics pane The primary portion of the GoldSim interface, where the graphical depiction of the model is shown.:
