You can carry out dynamic simulations in one of two ways in GoldSim (this is controlled via the Simulation Settings dialog):
- Elapsed Time: In an Elapsed Time simulation A simulation that tracks time using the elapsed time. (the default), you specify a Duration and the number of timesteps (and optionally, a Start date-time). The simulation is tracked in terms of elapsed time from the point the simulation began.
- Date-time: In a Date-time simulation A simulation that tracks time using the simulated Date/time., you enter a Start date-time and an End date-time, along with the number of timesteps, and the simulation is tracked in terms of the date-time.
Whether you are carrying out a Date-time simulation or an Elapsed Time simulation, you can choose whether your time series data is defined in terms of elapsed time or date-time. If your Simulation Settings are set to Elapsed Time when you insert the element, they default to being entered as numbers (with the default Time Unit being the Time Display Units The units (e.g., m, g, $/day) in which an output is displayed within GoldSim. specified in the Time tab of the Simulation Settings dialog); if your Simulation Settings are set to Date-Time when you insert the element, they default to being entered as dates.
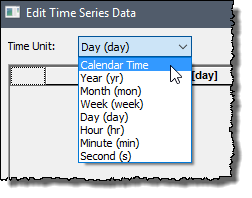
However, you can override the default setting by changing the selection in the Time Unit field:

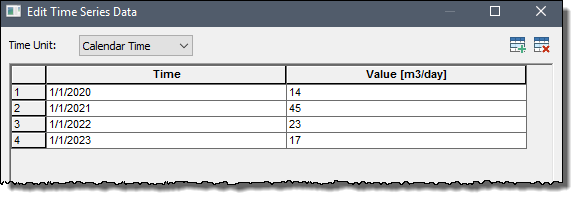
If you select "Calendar Time" from this list, the column expects a date-time to be entered:

Warning: If you are importing your time series from a spreadsheet, and the time series is formatted as dates in the spreadsheet, it will always be imported as dates into the Time Series element A type of input element that provide a very flexible and powerful way to input external time histories of data. (even if Specified time unit is not set to “Calendar Time”).
The date format that is expected is determined by the Windows settings for your machine. To change these settings, go to Control Panel and edit the Regional Options. In the example above, the date-time is specified as MM/DD/YYYY HH:MM:SS. You can use 12 hour formatting (and must then specify AM or PM) or use 24 hour formatting. Note that if you omit the hours, minutes, and seconds, GoldSim assumes 00:00:00 AM (the start of the day).
Note: Time Series elements accept dates between 1 January 100 and 31 December 9999.
Warning: Dates are entered in expressions in a different way than they are entered into a Time Series element. In particular, in an expression, dates must be surrounded by quotation marks. This requirement, however, does not apply when entering dates into Time Series elements.
After entering (or importing) time series in one format or the other, you can modify the format changing the selection for Specify time unit. If the data are in Date-time, they will be converted to elapsed time relative to the specified Start-time in the Simulation Settings dialog. If the data are in elapsed time, they will be converted to Date-time by adding the elapsed time to the specified Start-time in the Simulation Settings dialog.
Note: Even when running an Elapsed Time simulation, the Start-time is available for editing in the Simulation Settings dialog.
Learn more
- Controlling When Weeks and Years Start
- Display Units for Dates
- Entering Time Series Data as Dates or Elapsed Times
- Exchanging Date Information with a Spreadsheet
- Importing Data into a Time Series from a Spreadsheet
- Including Unscheduled Updates in Time History Results
- Pasting Data into a Time Series
- Referencing Dates in Expressions
- Referencing Time in Edit Mode
- Referencing Time in GoldSim
- Setting the Basic Time Options
- Specifying Time Series Data as Vectors or Matrices
- Understanding and Referencing Run Properties
- Viewing and Editing Time Series Inputs