Local Resource Stores are associated with specific Containers, and are only available to elements inside the Container (or in the case of a Conditional Container, to the Container itself).
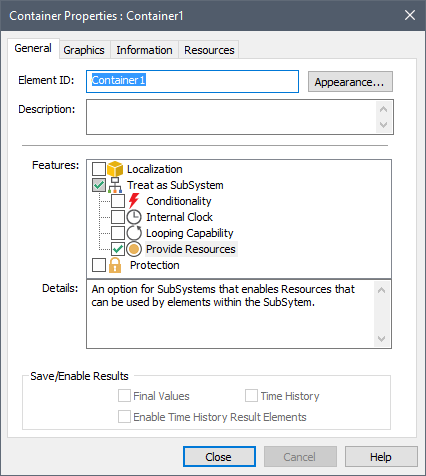
Local Stores are created via the Container dialog. Selecting the Provide Resources checkbox adds a Resources tab to the Container that allows you to create Local Stores:
 Warning: When you provide Resources to a Container, the Treat
as SubSystem feature is also automatically
selected (and cannot be deselected unless you first turn off Provide
Resources). That is, a Container with a Resource Store, by definition, is treated as a SubSystem, and this
puts certain limitations on how these Containers can be used.
Warning: When you provide Resources to a Container, the Treat
as SubSystem feature is also automatically
selected (and cannot be deselected unless you first turn off Provide
Resources). That is, a Container with a Resource Store, by definition, is treated as a SubSystem, and this
puts certain limitations on how these Containers can be used.
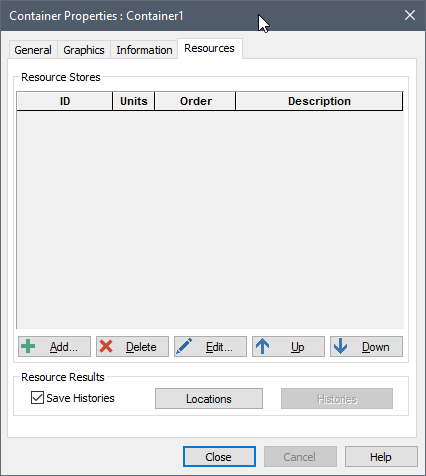
The Resources tab for a Container looks like this:
Selecting the Resources tab and pressing the Add button displays the following dialog for selecting the Resource Type for which you want to create a Local Store:
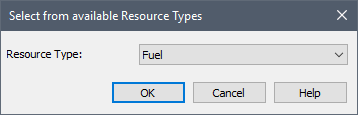
All available Resource Types will be listed. Note that a defined Resource Type is available as long as a Store for that Type has not already been created in the Container. That is, there can only exist a single Store of each Type in any given Container.
 Note: If there is only one Resource Type in the model and it is
available for use in the Container, the dialog above will be skipped and the
single Resource Type will be automatically selected.
Note: If there is only one Resource Type in the model and it is
available for use in the Container, the dialog above will be skipped and the
single Resource Type will be automatically selected.
After selecting the Resource Type, the following dialog will be displayed:
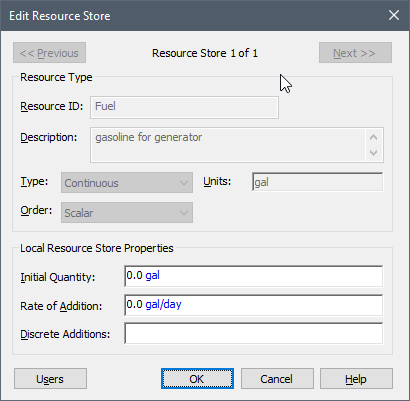
This creates a Local Store and provides access to the three input fields to define the Store: the Initial Quantity, the Rate of Addition and Discrete Additions.
The Initial Quantity must have the same attributes (order and dimensions) as the Resource Type.
Note: The Initial Quantity must be a
number or a link from a static variable (e.g., a constant Data element or a
Stochastic).
The Rate of Addition allows you to add to your Resource Store in a continuous manner. It is not provided if the Resource Type is “Items”. It must have the same order as the Resource Type, but the dimensions must represent a rate of change (e.g., if the Resource Type has units of mass, the Rate of Addition must have units of mass per time). The Rate of Addition must be entered as a non-negative value. A negative value for this input during a simulation will result in a fatal error.
Note: The specified Rate of
Addition represents a constant rate over the next timestep. Hence, if the Rate of
Addition was defined as “if(time > 10 day, 2 m3/day, 1
m3/day)”, and you were using a 1 day timestep, the rate would not
actually change to 2 m3/day until time = 11 days. That is, since at
time = 10 days, the if statement indicates that the rate is equal to 1
m3/day, GoldSim would assume that the rate was equal to 1
m3/day between 10 days and 11 days. If you wanted the rate to change
at 10 days, you would write the if statement as “if(time >= 10 day, 2
m3/day, 1 m3/day)”.
In addition to a continuous Rate of Addition, Resource Stores can also accept discrete changes, so that your Resource Store can change in a discrete manner. The Discrete Additions field only accepts discrete change signals (e.g., the output of a Discrete Change element). The discrete change signal must have a non-negative value. However, it can have either an Add instruction or a Replace instruction.
The Users button summarizes the properties of the Store, and lists all the elements that directly use this Store.
After you have added one or more Local Stores, the Resource tab for a Container shows all of the Resource Stores associated with the Container:
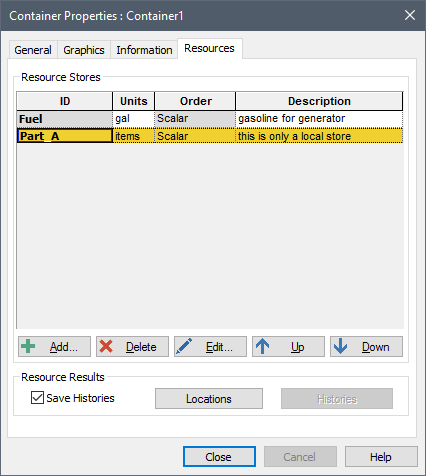
You can delete and edit existing Resource Stores using the Delete and Edit buttons, respectively.
Note: If a Resource Store is
being used and you delete it, GoldSim will allow this, but GoldSim will display
an error when you try to run the model.
The Up and Down buttons move Resources up and down the list (this is simply cosmetic; the order in which they are listed has no impact).
The Locations button summarizes the properties of all Stores that exist in the Container, as well as all of the elements that directly use those Stores.
If Save Histories is checked, GoldSim saves time histories of all of the Resource Stores in the model and users of those Stores. After the model is run, these histories can be viewed via the Histories button.
Learn more about:
Treating a Container as a SubSystem