
You can create (and edit) sets of array labels by selecting Model|Array Labels… from the main menu or by pressing the Array Labels button in the Advanced toolbar:

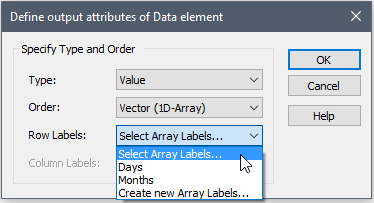
You can also create array label sets directly from the dialog for defining the Output Attributes for an element by selecting “Create new Array Labels…” from the drop-list:
Regardless of how you do so, the following dialog for defining the array labels will be displayed:
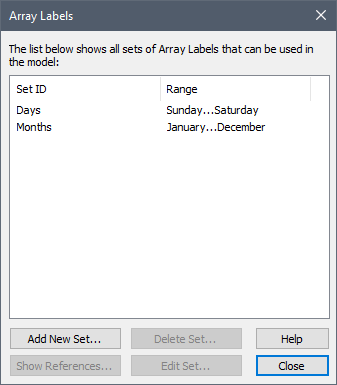
For convenience, GoldSim provides two commonly-used sets of array labels: Days has seven items (the days of the week); and Months has twelve items (the months of the year). GoldSim extension modules may also add some special sets (e.g., the Contaminant Transport Module adds a Species and an Elements set).
To add a new set of array labels, press Add New Set…. A dialog for specifying the type of array labels is displayed:
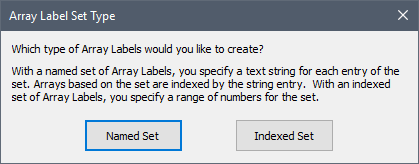
You must select whether you wish to define a Named Set or an Indexed (numbered) Set. If you choose to create a Named Set of array labels (or select an existing Named set to be edited), a dialog for editing the set will be displayed:
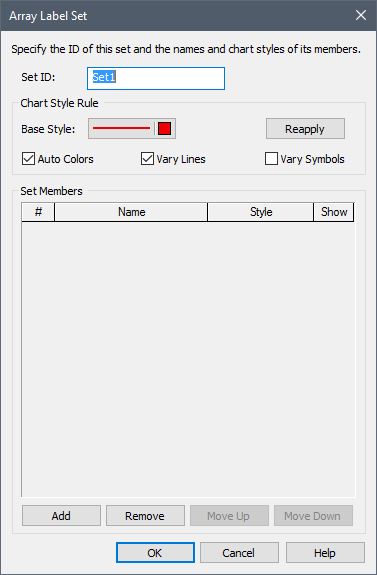
You can assign a name to a new set of array labels (by default it will be named Setn). You add and remove entries using the Add and Remove buttons. Holding the Ctrl key down changes the Remove button to a Remove All button, so you delete all entries. You can also paste a column of labels (e.g., from a spreadsheet) within this dialog by pressing Ctrl+V.
After you add two or more entries, the Move Up and Move Down buttons become available, allowing you to move entries up or down in the list. If you reorder the items, any items in existing elements using the set will automatically be re-sorted to the new sequence.
If you choose to create an Indexed set of array labels (or select an existing Indexed set to be edited) a dialog for editing the set will be displayed.
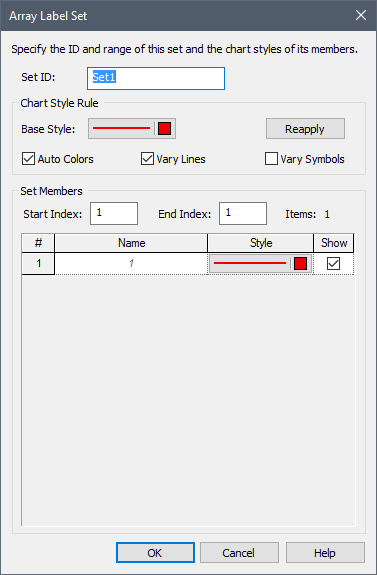
You can assign a name to the new set of array labels (by default it will be named Setn).
You must then enter a Start index (e.g., 1) and an End index (e.g., 100). When you press the Reapply button, GoldSim will then create all the entries for the set.
If you are editing an existing indexed set which is already referenced by some elements for which data has been defined, and change the Start index, GoldSim will prompt you for how you would like to adjust the values in existing Data elements that reference that set.
The Array Label editing dialog also allows you to define the Styles that are used when an element based on the set is displayed in a result chart. The Base Style, in combination with the Auto Colors, Vary Lines and Vary Symbols options allow you to automatically generate the Styles by pressing the Reapply button. Alternatively, you can click on any Style in the list to manually specify the Style attributes:
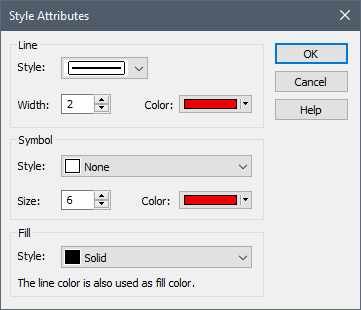
 Note: The Array Label Set
dialog can also be accessed when viewing results (in order to access the Chart Style
attributes). When accessed in this manner, in some cases, the Chart Style
options may be hidden (if editing them is not applicable).
The Show checkbox determines whether or not the item is displayed in result charts.
 Note: Array label sets are
saved with your model. If you wish to use the same set of array labels in
different models, you must recreate it in each model. Alternatively, you can
copy a set of array labels from one model file to another by copying an element
that uses the set. Note, however, that GoldSim will only allow you to do so if a
set of the same name does not exist in the model file into which the element is
being copied.
To edit an existing set of array labels, select the set from the list in the Array Labels dialog and press Edit Set…. The Array Label Set dialog will then appear for editing.
Learn more about:
Defining Custom Colors for Objects