You can export your current Species to a spreadsheet by pressing the Export… button from the main Species dialog. When you do so, after a confirmation dialog, you will be asked to specify the name and location of the MS-Excel file to which you want to export the data.
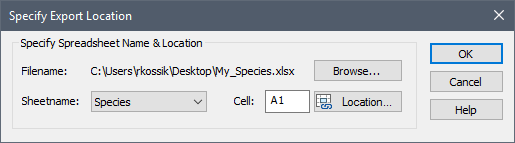
You can select an existing file, or you can create a new file. After doing so, you will be presented with the following dialog:
The Browse… button can be used to select a different spreadsheet file. You can directly select the Sheetname and the starting Cell (the first column and row of the exported data table), or you can press the Location… button to directly open the spreadsheet and manually select the Cell.
Note that if you selected a new file (as opposed to an existing one), GoldSim automatically creates a sheet called "Species" in the file. The default location will then be Cell A1 in the Species sheet.
Pressing the OK button exports the data to the spreadsheet. An example of an exported file (Species.xlsx), illustrating the file format, can be found in the Contaminant Transport Examples folder in your GoldSim directory.
Several points should be noted regarding this file:
•The first row (specified by the row of the user-specified Cell) is used for column headers. The fourth column header can change depending on the model settings. In particular, if the decay was specified using half-lives, the column header is "Half-life". Otherwise, it is "Decay Rate".
•Checkboxes defining species properties (Radioactive, Isotope) are exported as the strings "Y" (for checked) or "N" (for unchecked).
•The spreadsheet has four columns for daughter products. Daughters set to "none" in GoldSim are exported as blank cells to the spreadsheet.
•All other data is exported as General format strings. This allows expressions and units (for the half-life/decay rate field) to be exported.
Learn more about: